Grace

I don’t know about you, but when I find a project (especially a knitting project) that I fall in love with I start dreaming up what I’m going to wear with it, what materials I’m going to use, and all the other things that go into the project. Well the Grace from Jane Richmond was one of those projects. From the moment I saw it in Jane’s Island book I knew I needed to make one, and not just make one but use top quality materials for it.

So first I went on the quest for yarn and as you saw in earlier posts I had found the madelintosh tosh sock in charcoal at a lys I like to frequent. But by the time I found the perfect yarn and finished up my current WIP’s it was spring time so I decided to wait and knit it in the luvinthemommyhood summer kal because what would be better than knitting up the cardigan of your dreams with the perfect yarn in a wonderful group of encouraging and friendly knitters. While waiting for the kal to begin I ended up finding the perfect buttons from AddVintage, which made everything seem so perfect or so I thought.

So with all of that hype I mean I was wanting/expecting it to come out perfect, but much to my dismay the cardigan wouldn’t stay buttoned. I was very disappointed so then I started looking into reinforced button bands which require a whole bunch of sewing mainly by hand, so I discussed it with my mom and she came up with this idea that I will show you below. It worked and it was a lot faster than sewing it, now I still have some kinks I need to work out, like making sure the ribbon is perfectly line up behind the button hole so the hole in the ribbon can be perfectly centered and making sure that both sides of the cardigan are even. But here is what I did, it was my first time and I don’t swear by it, but I will probably do it again and figured I would share so you all could decide on your own what method to use.
20130913-011859.jpg

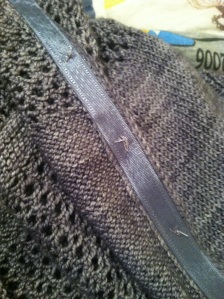
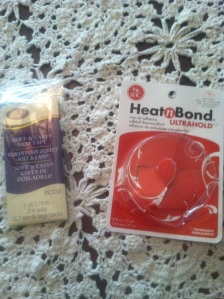
So I got some heat and bond and and hem tape that were the same size as each other and the button band.
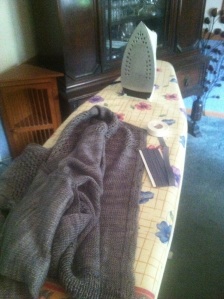
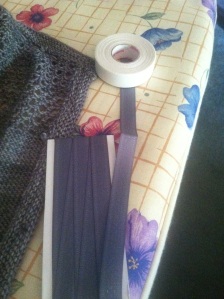
I measured out the heat and bond and the hem tape to be the exact same size as the button band.

I measured out the heat and bond and the hem tape to be the exact same size as the button band.

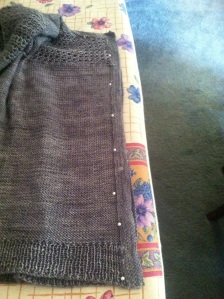
Then I pinned the buttons bands together evenly with the wrong sides facing away from each other.

Then I pinned the buttons bands together evenly with the wrong sides facing away from each other.

20130913-011832.jpg

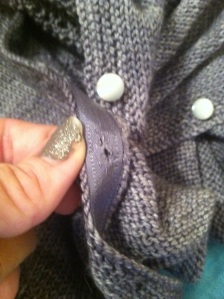
Then I followed the directions of the heat and bond using my iron and after I had the one side of the adhesive adhered to the button band I put the ribbon down and bonded it to the cardigan. After both sides were completed I took an exacto knife and made holes through the ribbon so the buttons could go through and resewed the buttons onto the cardigan.

The wrong side of the cardigans button band, the side with buttons sewn in.

The wrong side of the cardigans button band, the side with buttons sewn in.

The side with the button hole cut it.

The side with the button hole cut it.

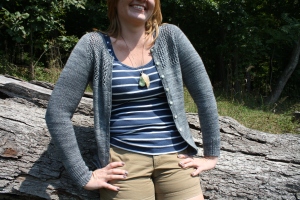
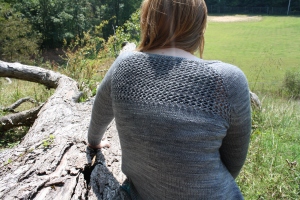
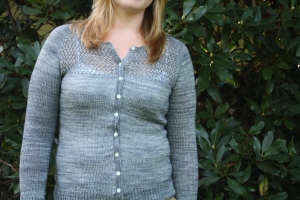
So here is my Grace.

IMG_4654 IMG_4656 IMG_4653

I love the madelintosh yarn it is fabulous and I love the buttons. I will have more about this cardigan and what I did with the button band in a later post.

Well I love my grace now, and it fits perfectly. The madelintosh was a dream to work with, that was the first time I had ever worked with it and it is definitely is not going to be my last considering I have some in my stash waiting to be used. You can see my project page on ravelry here.

*I just thought about this while responding to Michelle comment. When it comes to ironing the heat and bond and also when it comes to adding the hem ribbon to the button band. Sit the iron down, let it set for a few seconds, pick the iron up and move on to the next piece. DON’T push the iron or it will cause it to stretch out and the band will be longer and you may have two different size button bands.
It’s beginning to look a lot like…

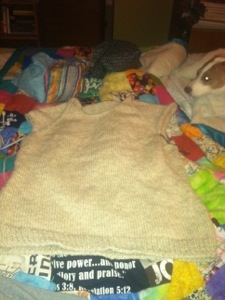
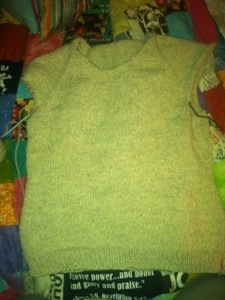
A sweater! I am so excited! Yes I have basically been working on this sweater nonstop, I have rarely put it down for a different project, but details, details I will be wearing this sweater in two days tops! By Sunday I plan to have it finished and oh goodness does it look great! I love this pattern Jane Richmond did it again. She designed a fabulous, simple pattern that you just don’t want to put down. Here are some pictures of the sweater. Also here is a link to my ravelry Raglan sweater project page.

So close to being finished! All that's left is the sleeves and the ribbing around the neck.

So close to being finished! All that’s left is the sleeves and the ribbing around the neck. Oh and excuse my pup Snoopy she didn’t want to move out-of-the-way for the picture.

Due to poor lighting it looks a tad bit yellow/greenish but here is a more aerial view.

Due to poor lighting it looks a tad bit yellow/greenish but here is a more aerial view.

So everything has been going really well with the sweater, I only made one blunder but caught it before I finished. Not thinking I did a 2×2 ribbing when it called for a 1×1. Luckily I was only an inch in, so I pulled it out and started over with the 1×1. I like the look of the 1×1 for this project a lot better than the 2×2. The sweater does fit really well though! I didn’t want to put it on tonight, but when I get completely finished I will totally post pictures of me wearing it. Hopefully in better light.

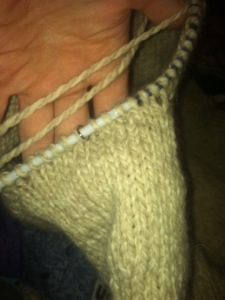
So I just started one of the sleeves and in doing that I had to pick up twelve stitches and might I add it turned out wonderfully. I was concerned with doing it because this is the first project were it was important I did it right and well I did. I am so happy with how it looks!

Under the arm/armpit where I picked up the stitches! It turned out so well!

Under the arm/armpit where I picked up the stitches! It turned out so well!

Just recently Shannon from luvinthemommyhood posted a link from an older post of hers where Jane Richmond herself made a picture tutorial on the way to pick up stitches click here to go to that post. She also posted here a few other places for tutorials on it.After reading through it I feel loads more confident and I have the result to prove it!.

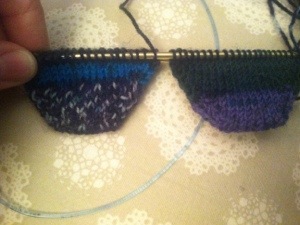
So besides working on the sweater I have worked on my for the love of pink cowl some, my top-secret project, and I started a new pair of socks with a new technique that I have been too nervous to try until now. The technique is the magic loop and to top it all off besides learning that I also decided to jump in feet first and knit two socks while I am at it, so far it is going very well.

I used the Judy’s magic cast on for the toe, it is my go to sock cast on I love it and I am using the universal toe-up sock formula for the rest of it.

20130125-223816.jpg

I’m generally pretty OCD about symmetry, but surprisingly enough I really don’t care if my self stripping socks look identical. Now if they were very clear bold stripes I would, but these I really could care less.

More Snoopy pictures! Isn’t she cute?!

20130125-223808.jpg20130125-223801.jpg

What new techniques have you been wanting to try? Do you have a project you just can’ t put down?